

Christy Smith
Software Engineer

Vidur Khanna
Product Manager

Elizabeth George
Head of Developer Growth
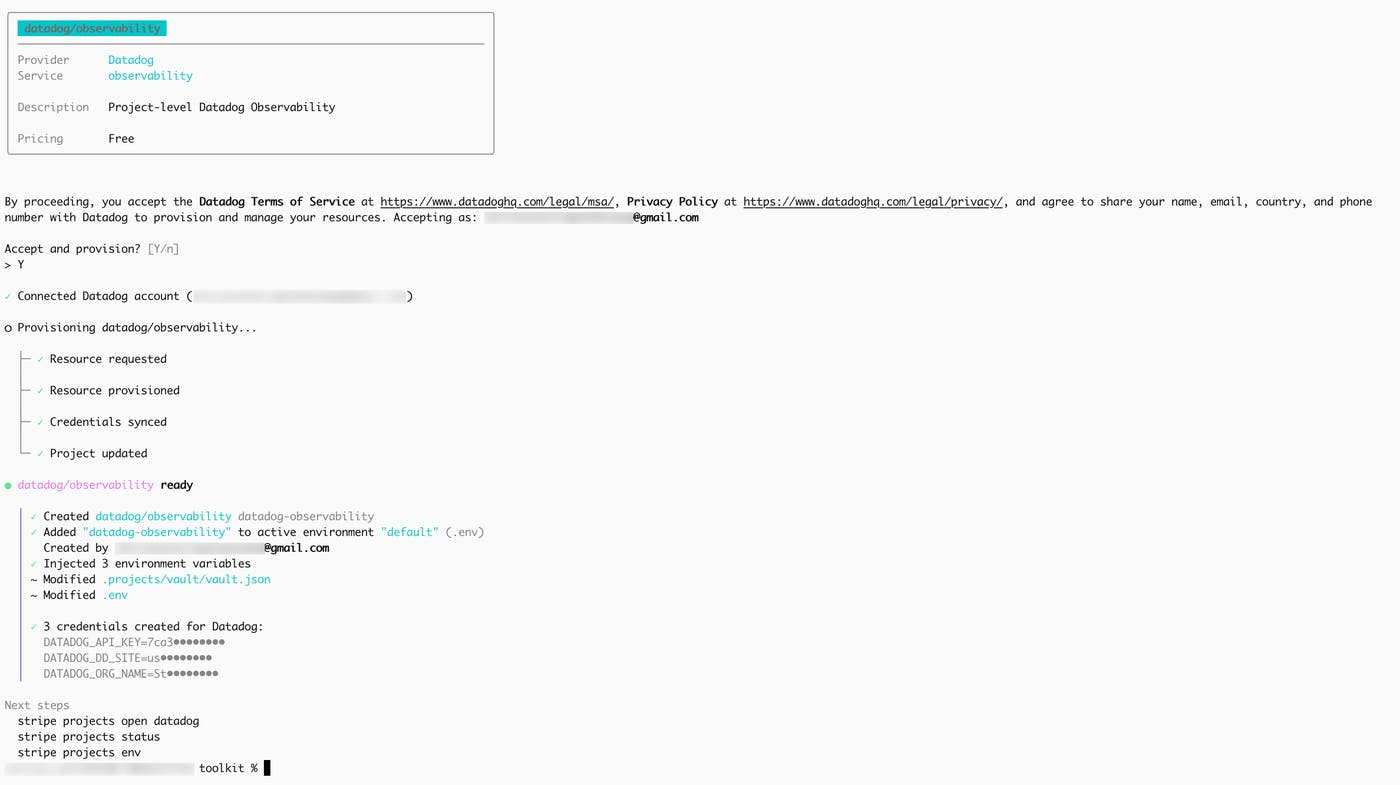
Stripe Projects reduces the manual work of setting up, managing, and paying for third-party SaaS solutions. You can now use it to get started with Datadog in just two commands:
stripe projects initstripe projects add datadog/observabilityIf your Stripe account has a verified email address, running those commands in the Stripe CLI gives you a Datadog organization with a 14-day free trial and an automatically generated API key that is ready to use. You avoid email verification loops, tab-switching to copy an API key out of a dashboard, and lengthy sign-up forms. You don’t even have to open the Datadog UI.
What Stripe Projects is
Stripe Projects, available in developer preview, is a CLI workflow for discovering, provisioning, and managing the services your app depends on. It’s like a package manager, but for provisioning your app stack.
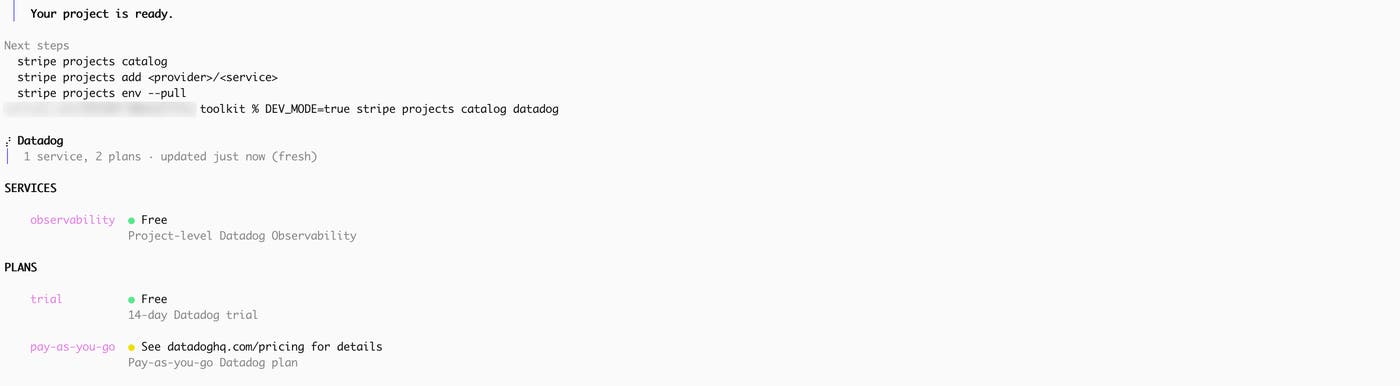
Datadog collaborated with Stripe as a co-design and launch partner for the protocol that powers Stripe Projects. Here’s how Datadog appears in the catalog:
Why Datadog has only a single service in the catalog
If you know Datadog, you know we have plenty of products to choose from. The decision about which products you use belongs in your code, not in a provisioning step. That’s why we shipped only one service, observability, for the Stripe Projects catalog instead of one service per product.
When you provision the service, you get a Datadog org and an API key that works across the entire Datadog platform. You can send logs today, add traces tomorrow, and monitor your AI agents when they’re ready in production. If you adopt more Datadog products, you don’t need to return to the catalog or re-provision anything.
Billing, without the billing
Because Stripe users have a shared payment token, you can go from the free trial to the pay-as-you-go plan in one command:
stripe projects upgrade datadog-observabilityOr you can skip the trial and provision pay-as-you-go Datadog from the beginning:
stripe projects add datadog/pay-as-you-goEither way, your existing Stripe payment method covers Datadog. There is no separate billing setup on the Datadog side, and you don’t have to enter credit card information or initiate a procurement process.
What lands in your Stripe project
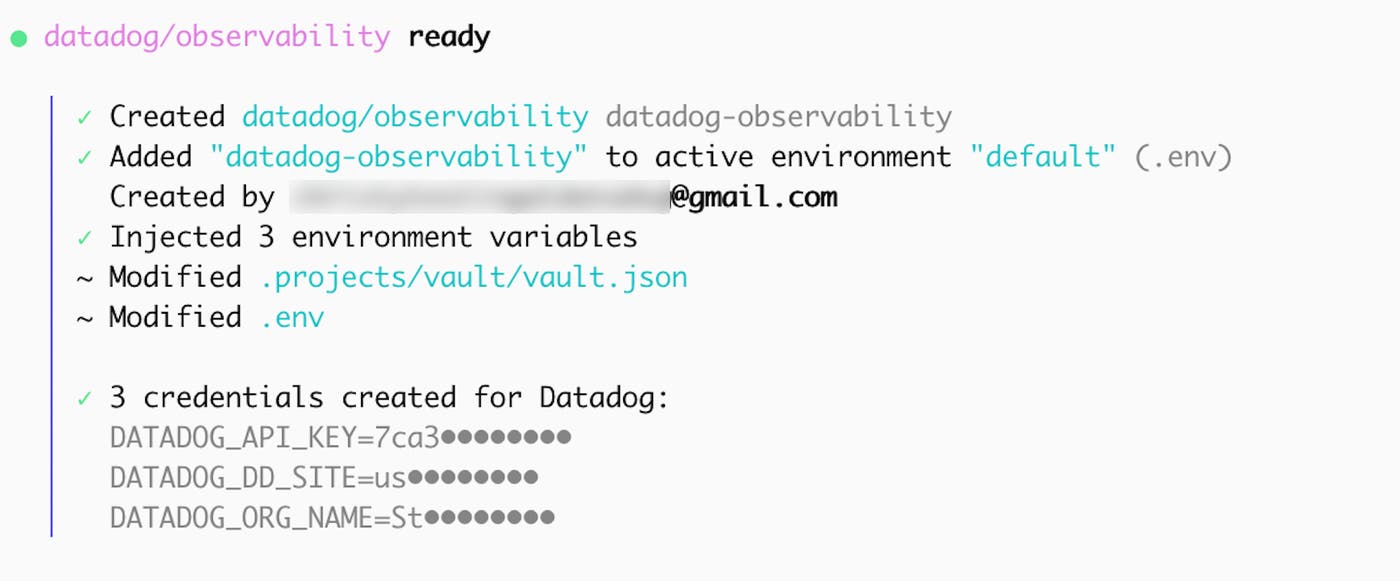
After provisioning is complete, your .env file includes your Datadog API key, site, and organization name. These values provide the connection details that an SDK or the Datadog Agent uses to send data to your Datadog org.
Why Datadog and Stripe collaborated
Too many SaaS tools come with a shadow to-do list: create the account, verify the email address, add a payment method, figure out who owns the subscription, and remember that all of it exists at renewal time. It adds up to friction that can impact your technical decisions. Teams may end up choosing tools based on how many vendors they can tolerate managing rather than what they actually want to build with.
With Datadog on Stripe Projects, choosing your observability platform is like picking any other dependency. You enter one command after you’ve initialized Stripe Projects, you’re charged through your existing payment method, and your workflow (or your agent’s) never leaves the terminal.
Get started with Datadog on Stripe Projects
Datadog on Stripe Projects makes it possible to provision Datadog from your terminal or with an agent and manage billing through the Stripe account that you’re already using. You can start a 14-day free trial without leaving the Stripe CLI. Once you’re ready, install the Stripe CLI and the Projects plugin, and then run the two commands:
stripe projects initstripe projects add datadog/observabilityTo learn more about Stripe Projects, read the Stripe Projects documentation.
