Griffin Solot-Kehl

David M. Lentz
When an alert triggers in your application or environment, you want your team to know as soon as possible so you can troubleshoot quickly and minimize any user-facing issues. Datadog can automatically alert you via email and collaboration services like Slack and PagerDuty. The simple, real-time communication provided by SMS can also be an effective way to alert your team.
In this post, we'll walk through how to use Datadog's webhooks integration to automatically send an SMS message via Twilio. To do this, we'll show you how to:
- Create a webhook that calls the Twilio SMS API
- Use a Synthetic test to call the webhook if an API endpoint is unavailable
- Add dynamic data to the webhook's payload and link to the Datadog mobile app
We'll use a Synthetic test to trigger our webhook, but this is just one of the many ways you could use webhooks to automatically alert you of issues that can affect your service reliability or user experience. You can use the steps covered in this post to trigger webhooks from event monitors and other types of alerts, too, so you can automatically interact with third-party and internal services as changes occur in your environment.
Create your webhook
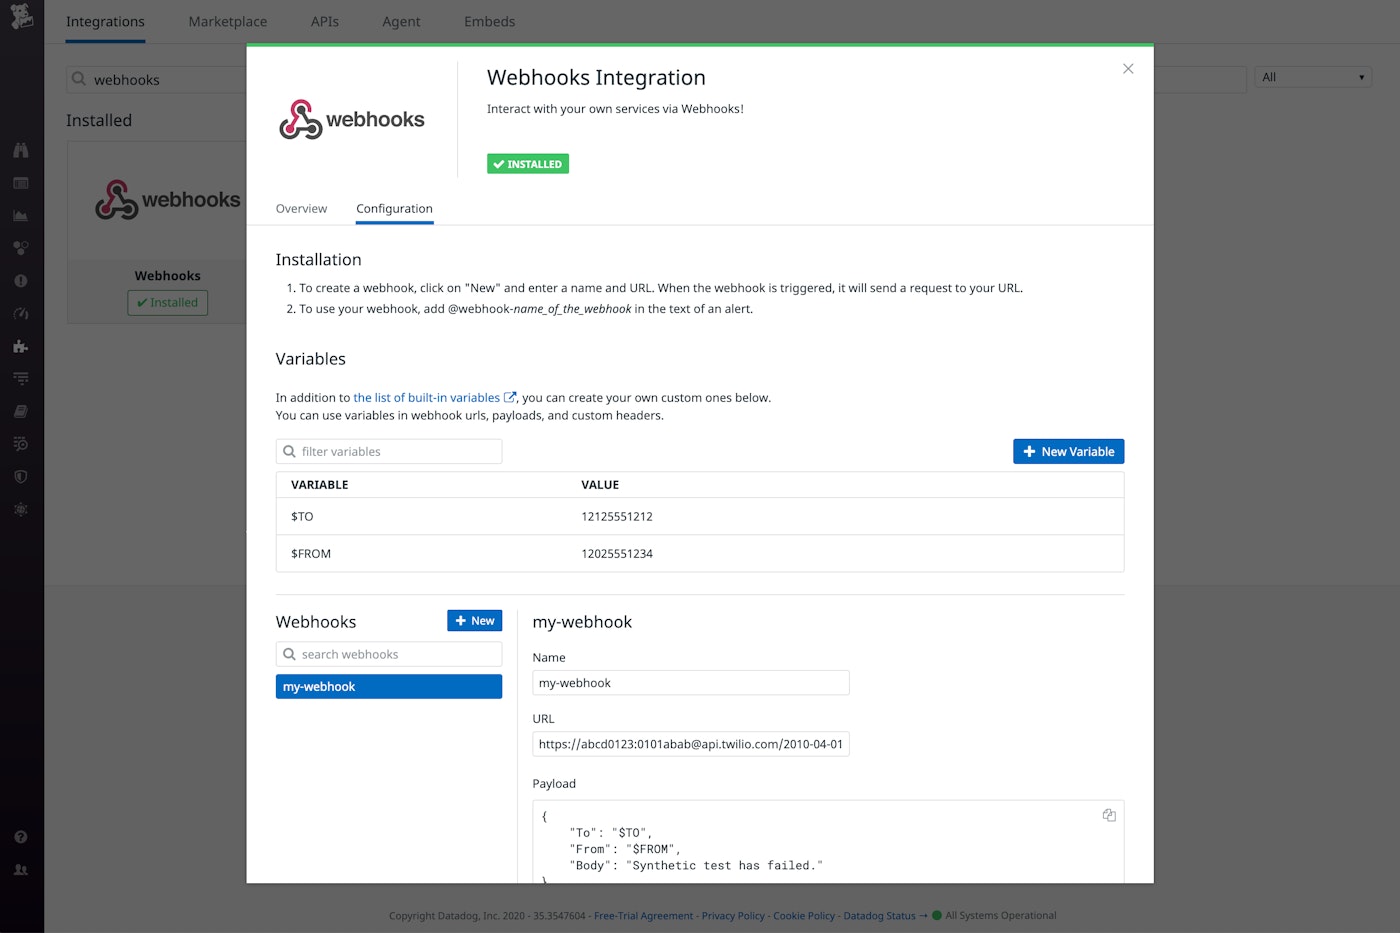
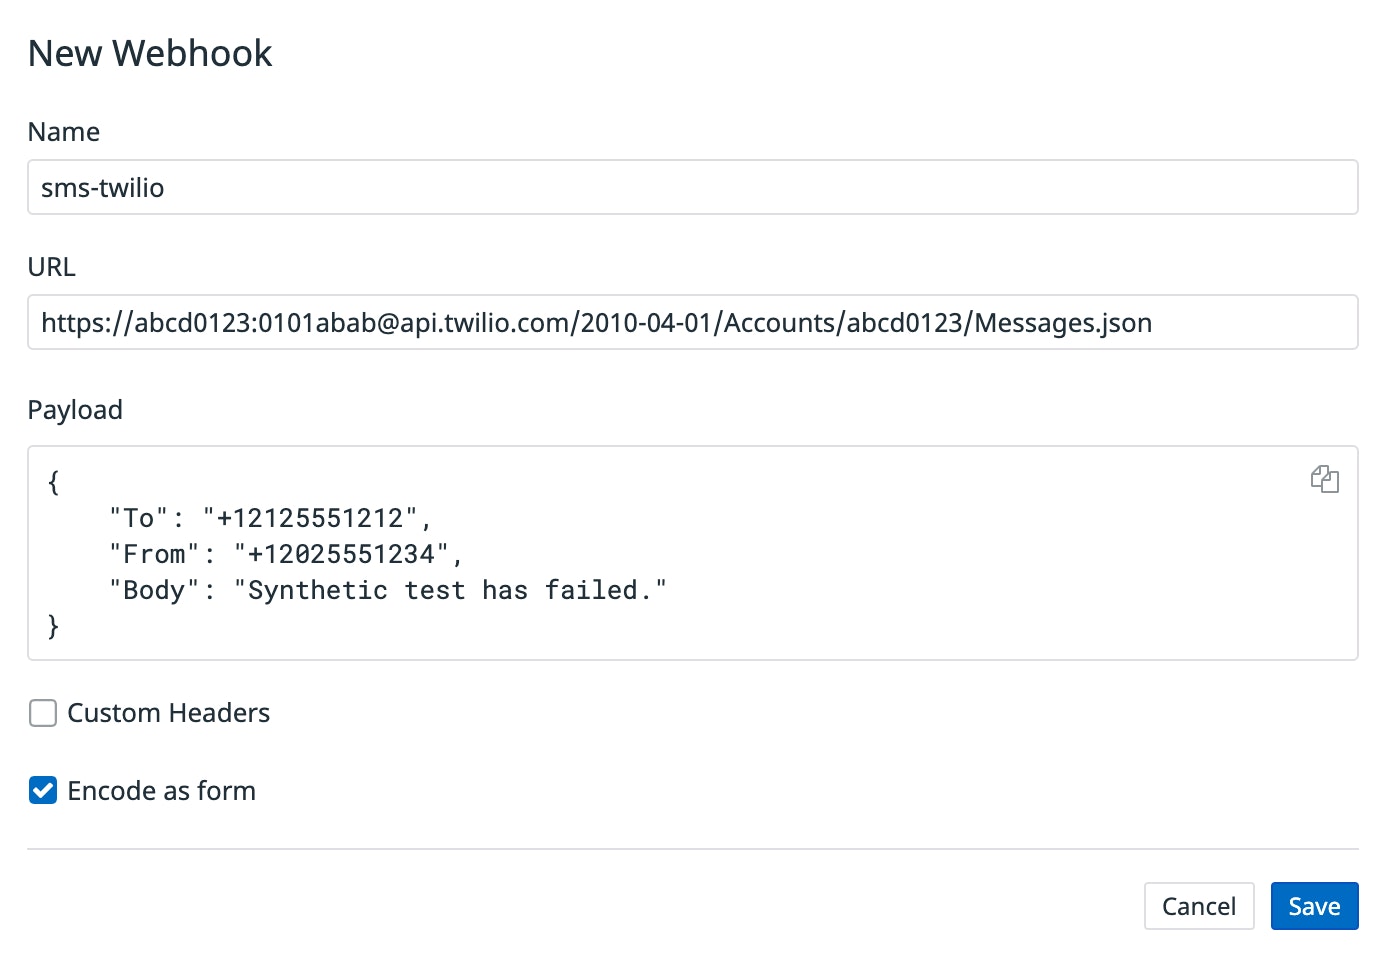
To create a webhook that uses the Twilio SMS API to send a message, first navigate to the webhooks integration tile in the Datadog app (or sign up for a free trial if you're new to Datadog). Give the webhook a name and enter the Twilio SMS API URL. The example below shows how to construct the API URL. Make sure to replace the variables with your Twilio account SID and authentication token; you can get both of these from your Twilio dashboard.
https://<MY_TWILIO_ACCOUNT_SID>:<MY_TWILIO_AUTH_TOKEN>@api.twilio.com/2010-04-01/Accounts/<MY_TWILIO_ACCOUNT_SID>/Messages.jsonThe webhook's payload is the JSON data that defines the SMS message. It includes the number the message should be delivered to, the number it will come from (which is configured in your Twilio account), and the body of the message, as shown in the sample code below.
{ "To": "+12125551212", "From": "+12025551234", "Body": "Synthetic test has failed."}The body in this example is just a brief message made up of plain text. Later in this post, we'll show you how to use the body of your message to provide rich details to your team to speed up their troubleshooting.
The screenshot below shows an example of all the information necessary to create a webhook. Note that we've checked the Encode as form checkbox to send the data to the Twilio SMS API in the correct format.
See the documentation for more information about using Datadog's webhooks integration.
Trigger your webhook
One way to trigger a webhook is from a Synthetic test, which allows you to proactively evaluate your APIs and key functionality of your application. For example, you can test your store's checkout process or an endpoint in an internal application to ensure that it's responding quickly and without errors.
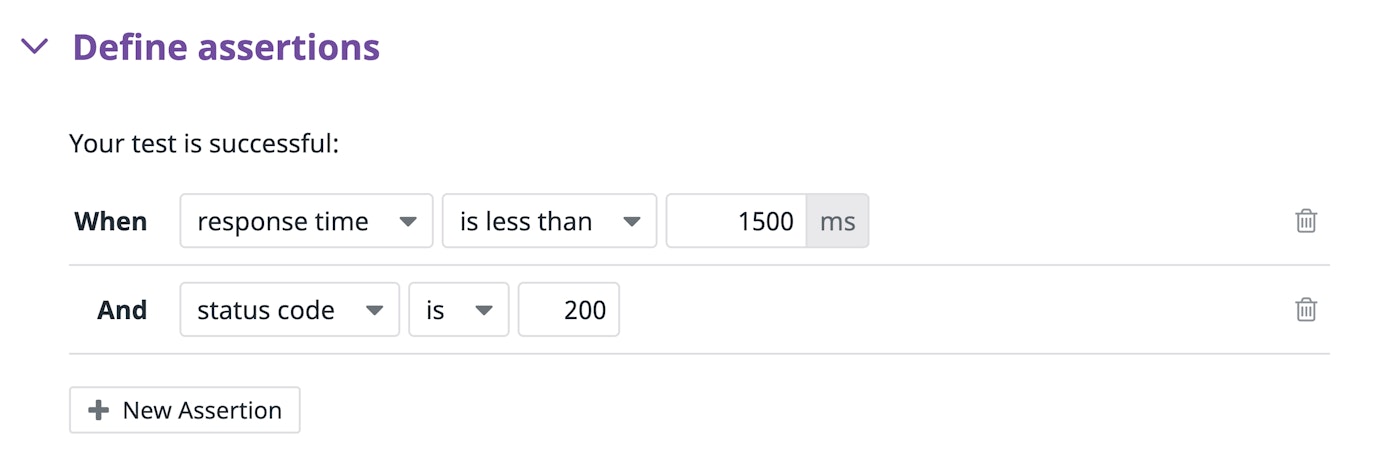
The screenshot below shows the assertions from a Synthetic test. This test will fail if the endpoint does not respond with a status code of 200, indicating everything is OK, within 1500 ms.
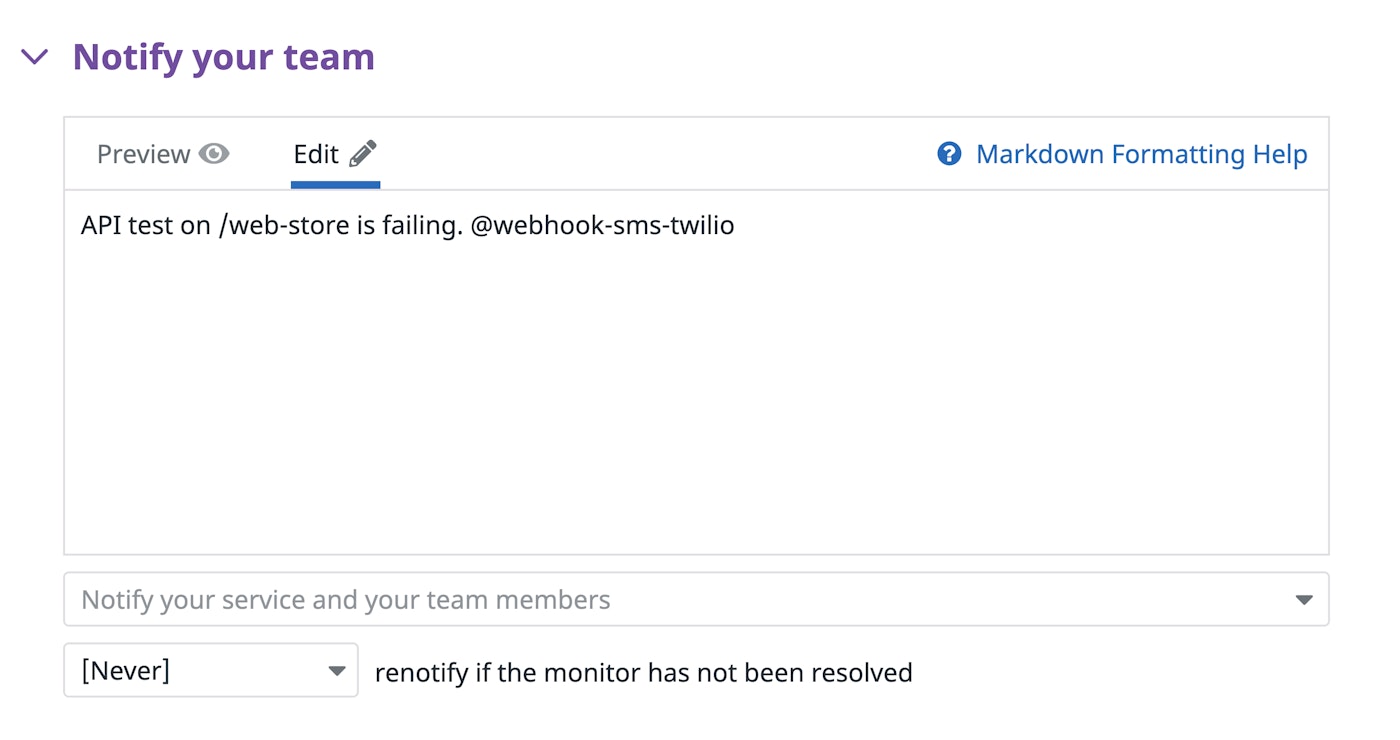
The next screenshot shows the notification message this test will send if it fails. This notification provides context by identifying the endpoint tested (/web-store) and uses the "@" symbol to mention the webhook we created earlier. This will cause the webhook to post its payload—To, From, and Body—to the Twilio SMS API, which will send the SMS message.
Make the most of the webhooks integration
An SMS message sent via a webhook can be your team's starting point for troubleshooting a failed Synthetic test or other alert. In this section, we'll show you how to enrich your webhook's payload by using links and variables to create a message that can help reduce mean time to resolution (MTTR) by giving your incident responders a head start on investigating issues.
Variables
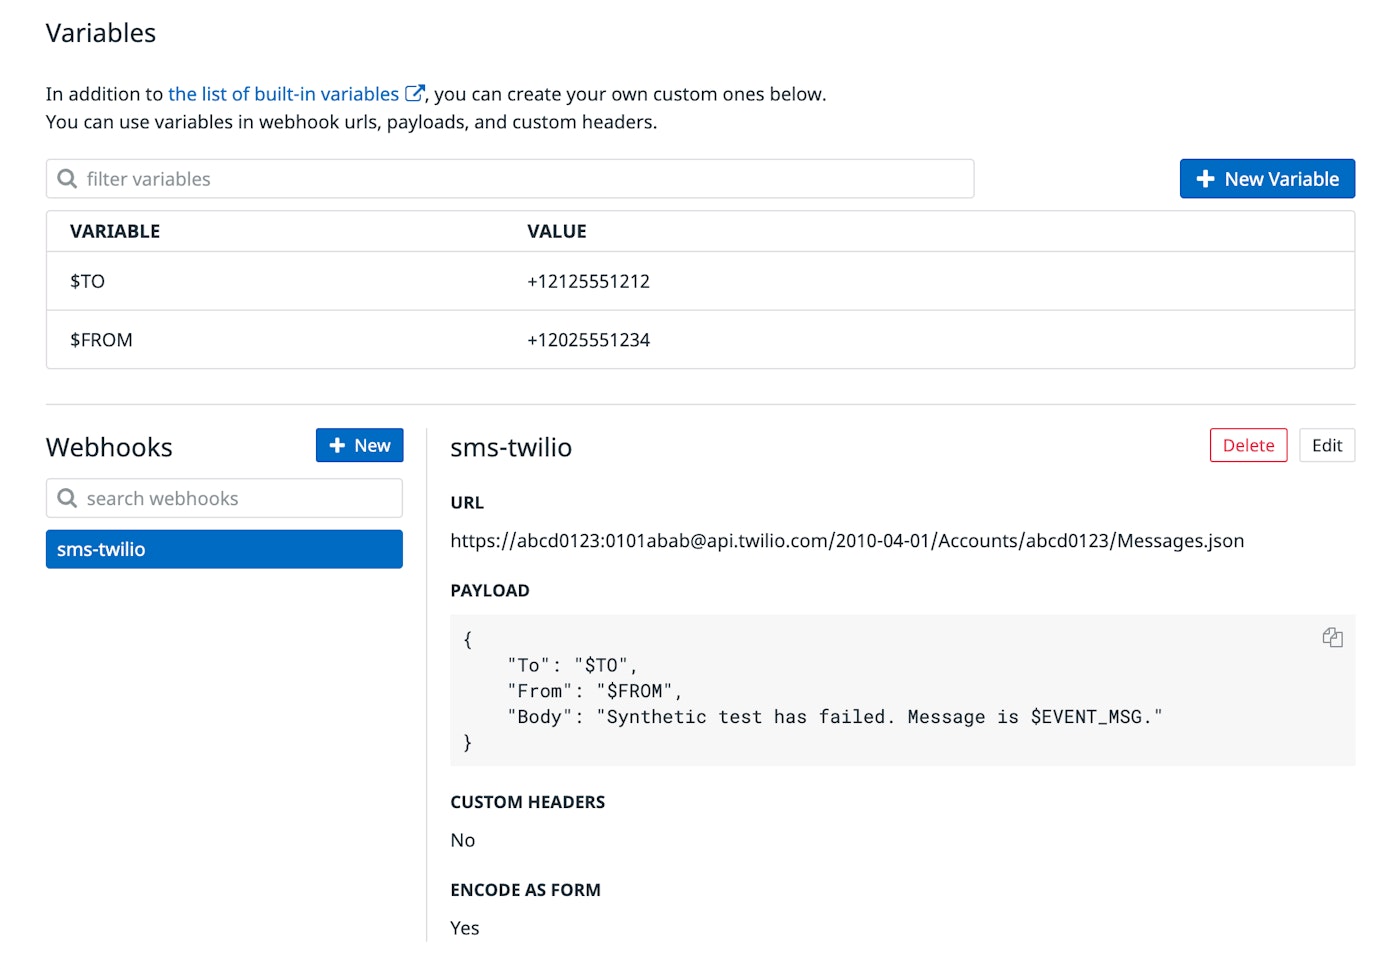
Datadog provides built-in webhook variables that allow you to include alert-specific information in your webhook's payload. This can help to quickly identify, for example, which test failed or which alert was triggered. And you can create your own custom webhook variables to define values that you can reuse across all your webhooks, which not only gives you a shortcut when you compose your messages but also helps enforce consistency.
In the screenshot below, we've created $TO and $FROM variables to hold the strings we use in the webhook's payload. We've also expanded the payload's body to use the built-in variable $EVENT_MSG to provide context about the alert.
Links
To make the message generated by your webhook actionable, you can include links in the payload to relevant dashboards and other useful pages in Datadog. For example, the sample code below uses the built-in variable, $ORG_NAME, in two links to help facilitate the incident response process. The first link lets you easily search for other incidents in Datadog Incident Management, while the second one allows you to create a new incident if the alert indicates an issue that requires a collaborative incident response.
{ "To": "$TO", "From": "$FROM", "Body": "Synthetic test has failed.\r\nSee $ORG_NAME incidents: https://app.datadoghq.com/incidents?query=$ORG_NAME\r\nCreate a new incident: https://app.datadoghq.com/incidents/new"}The Datadog mobile app
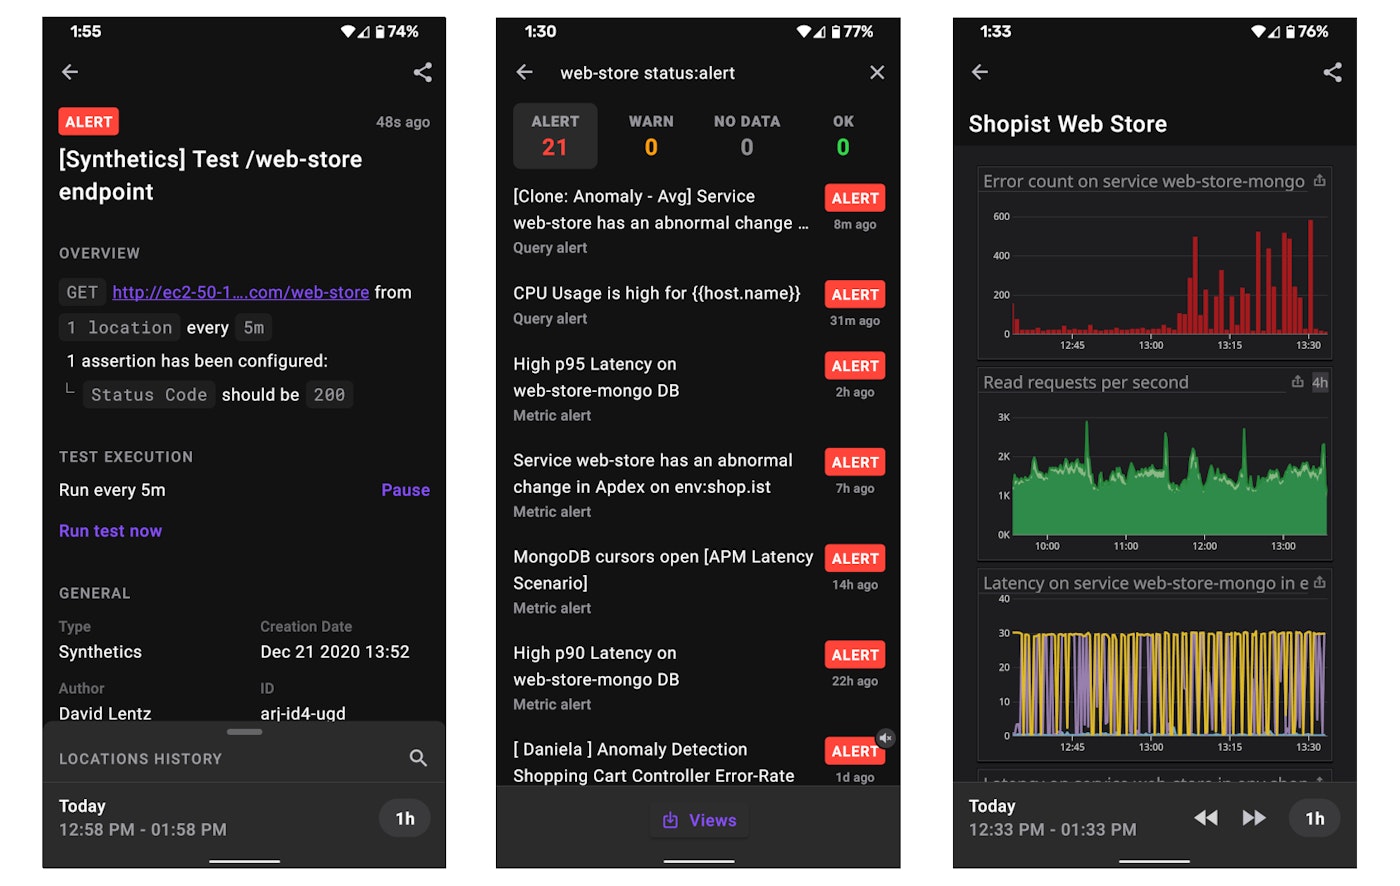
An SMS alert is just one tap away from the Datadog mobile app. Whether your webhook will be triggered by an event monitor, a failed Synthetic test, or some other alert, you can include a link in your payload to the alert that triggered the webhook, as shown below.
{ "To": "$TO", "From": "$FROM", "Body": "Synthetic test has failed.\r\nView this alert in Datadog: https://app.datadoghq.com/monitors/$ALERT_ID"}By following the link in an SMS message created by this webhook, users can open the app and begin troubleshooting. The screenshot below shows the alert that triggered (on the left), a search for similar alerts (in the middle), and a dashboard (on the right) showing real-time data that could help us investigate this alert.
See the documentation for more information about the Datadog mobile app.
Hook into any service
If you're using Synthetic Monitoring to test an endpoint that's part of a Twilio application, an internal application, or a public-facing API, you can leverage Datadog's webhooks integration to automatically send an SMS notification via Twilio whenever your test fails. But that's just one way to call a webhook: you can use these steps to automatically trigger actions in any of the services you rely on based on any alert you define in Datadog—including metric alerts, event monitors, anomalies, forecasts, and more. See the documentation for more information and examples. If you're not already using Datadog, start today with a 14-day free trial.

