
In Part 1, we explored three primary types of metrics for monitoring your Red Hat OpenShift environment:
- Cluster state metrics
- Container and node resource and quota metrics
- Work metrics from the control plane
We also looked at how logs and events from both the control plane and your pods provide valuable insights into how your cluster is performing.
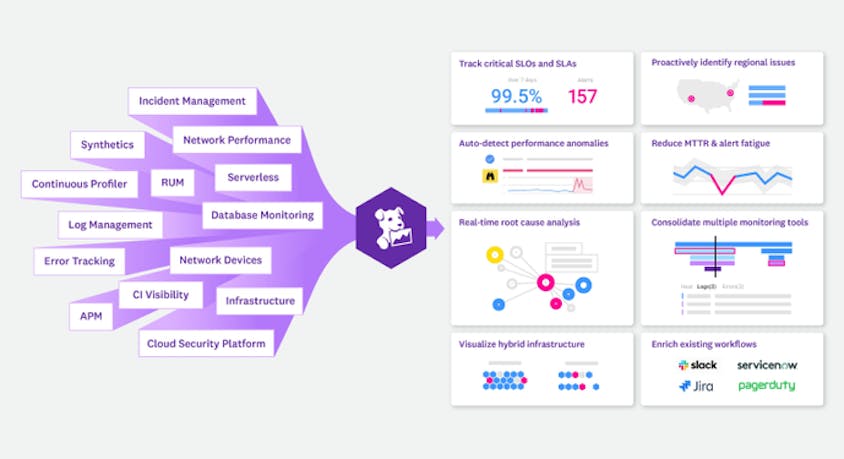
In this post, we’ll look at how you can use Datadog to get end-to-end visibility into your entire OpenShift environment. Datadog enables you to collect and analyze metrics, logs, performance data from your applications, and more, using one unified platform. We will cover how to:
- Deploy the Datadog Cluster Agent and node-based Agents to collect all of the metrics we covered in Part 1
- Leverage Autodiscovery to monitor dynamic, containerized workloads even as they move across your cluster
- Set up log collection and APM to get deeper insights into your OpenShift cluster and applications
Before getting started, it’s important to understand what level of access the Datadog Agent needs to collect information from your cluster, as that affects how you deploy Datadog.
Choose the right security level
OpenShift uses two primary mechanisms for restricting cluster access: role-based access control (RBAC) and security context constraints (SCC). The former controls permissions for users and services based on defined roles. The latter restricts what privileges pods have.
The Datadog Agent can collect information from several different sources in your OpenShift cluster, including the Kubernetes API server, each node’s kubelet process, and the hosts themselves. Datadog provides three general levels of data collection based on what permissions are required:
- Restricted for basic metric collection
- Host network for APM, container logs, and custom metrics
- Custom for full Datadog monitoring
Restricted
Restricted access is essentially allowing Datadog to access only the API server and kubelet processes. With this level of access you can collect most of the key metrics and cluster events we covered in Part 1. Deploying Datadog with restricted access requires providing the Agent with the needed role-based access control (RBAC) permissions. For more information, see our documentation.
Host network
OpenShift’s default SCC configuration does not allow pods to directly access their host nodes’ ports. The Datadog Agent needs access to host ports in order to collect custom metrics (via the DogStatsD protocol), APM traces, and logs.
In order to allow the Agent pods to access their hosts’ ports, you can modify the hostnetwork or hostaccess option in their SCC configuration to grant the proper permissions. We will do this when we configure the Datadog Agent.
Custom
You can collect even more information about your OpenShift environment by applying custom SCC to the Datadog Agent. This means, in addition to providing the Datadog Agent pods access to host ports as we did above, also granting them super privileged status (spc_t). This allows them to collect system information at the container and process levels.
In order to use the Datadog Agent’s full feature set, first create a service account for the node-based Agents. This is part of our deployment steps below. Then, include the service account in the users section of the SCC manifest here. Finally, apply the manifest:
oc apply -f path/to/scc.yamlThe Datadog Agent
The Datadog Agent is open source software that collects and reports metrics, distributed traces, and logs from each of your nodes, so you can view and monitor your entire infrastructure in one place. In addition to collecting telemetry data from Kubernetes, Docker, CRI-O, and other infrastructure technologies, the Agent automatically collects and reports resource metrics (such as CPU, memory, and network traffic) from your nodes, regardless of whether they’re running in the cloud or on-prem infrastructure.
Datadog’s Agent deployment instructions provide a full manifest for deploying the containerized node-based Agent as a DaemonSet. If you wish to get started quickly for experimentation purposes, you can follow those directions to roll out the Agent across your cluster. In this guide, however, we’ll go one step further to show you how to not only install the Agent on all your nodes but also deploy the specialized Datadog Cluster Agent.
The Datadog Cluster Agent
The Datadog Cluster Agent provides several additional benefits to using the node-based DaemonSet alone for large-scale, production use cases. For instance, the Cluster Agent:
- reduces the load on the Kubernetes API server for gathering cluster-level data by serving as a proxy between the API server and the node-based Agents
- provides additional security by reducing the permissions needed for the node-based Agents
- enables auto-scaling of Kubernetes workloads using any metric collected by Datadog

Regardless of whether you choose to use the Cluster Agent or just the node-based DaemonSet, there are several methods for installing the Datadog Agent. In this article, we will go over how to use the Helm package manager to install the node-based Datadog Agent along with the Datadog Cluster Agent to provide comprehensive, resource-efficient Kubernetes monitoring.
Using Helm
Helm is a package manager for Kubernetes applications. It uses charts to define, configure, and install applications. Charts consist of different types of files. The two types that we’ll focus most on here are:
- templates, which provide the skeleton of a Kubernetes manifest with keys and default values or template variables that will be dynamically populated
- values, which provide the data to be applied to the template files
If you do not have Helm, you can get started by installing it and gaining access to the Helm Chart Repository, where the Datadog Agent and Cluster Agent charts are available. Note that the steps below assume that you are running Helm 3.x. If you are using an older version, see our documentation for instructions.
We’ll need to create a Helm values chart to configure the Cluster Agent and node-based Agents for an OpenShift environment.
Create the Datadog values chart
In order to provide both the Cluster Agent and node-based Agent with the necessary configuration, create a file, values.yaml. You can find find an example of parameters and configuration options here. But below, we’ll point out several things to include in the values file to make sure that we can properly monitor key data from an OpenShift cluster:
values.yaml
datadog:
  apiKey: <API_KEY>
  criSocketPath: /var/run/crio/crio.sock
  # Depending on your DNS/SSL setup, it might not be possible to verify the Kubelet cert properly
  # If you have proper CA, you can switch it to true
  kubelet:
    tlsVerify: false
  confd:
    crio.yaml: |-
      init_config:
      instances:
      - prometheus_url: http://localhost:9537/metrics
The datadog section of the values file includes general configuration options for Datadog. This includes, for example, your API key. In this example we have also instructed Datadog to look for the CRI socket by passing the criSocketPath parameter. This is necessary for the Agent to collect container metrics for OpenShift clusters using versions 4.x or 3.11 with the CRI-O container runtime instead of Docker, which is the default. If you are using Docker, you can leave these parameters out.
values.yaml
agents:
  useHostNetwork: true
  podSecurity:
    securityContextConstraints:
      create: true
  tolerations:
  # Deploy Agents on control plane nodes
  - effect: NoSchedule
    key: node-role.kubernetes.io/master
    operator: Exists
  # Deploy Agents on infra nodes
  - effect: NoSchedule
    key: node-role.kubernetes.io/infra
    operator: Exists
clusterAgent:
  podSecurity:
    securityContextConstraints:
      create: true
The agents section configures the node-based Agents. If your OpenShift cluster is hosted on a cloud provider, the useHostNetwork: true parameter is necessary for the Agent to collect host-level metadata. Note that this also provides the Agent with access to host-level ports, letting you collect traces, logs, and custom metrics via DogStatsD from your containerized workloads. Alternatively, you can enable the hostaccess SCC. If you deployed the custom SCC, you have already taken care of this.
By default, OpenShift includes eight predefined security context constraints, which handle privileges for each pod. Because of this, you will need to set tolerations to schedule the node-based Agent on control plane and infra nodes.
In the example above, the securityContextConstraints parameter applies the SCC that will allow the Agent to collect data from your cluster. If you are deploying Datadog as a DaemonSet, you will need to deploy one of the three context constraints listed here. For example, if you wanted to use the custom Datadog SCC to gain access to all features you would manually deploy this scc.yaml file.
values.yaml
kube-state-metrics:
  securityContext:
    enabled: false
As shown in the example above, you need to set securityContext under the kube-state-metrics parameter to false in order to enable the Cluster Agent to collect data from kube-state-metrics, a service that streams metrics about the state of objects (e.g., Deployments, nodes, and pods) from the Kubernetes API server in real time.
Install the Datadog chart
Once you have your values.yaml file ready, you can use Helm to install Datadog to your OpenShift cluster by running:
helm install -f path/to/values.yaml <AGENT_SERVICE_NAME> stable/datadogReplace <AGENT_SERVICE_NAME> with an appropriate name for the Datadog resources (e.g., datadog-agent). You should see output like the following:
NAME: datadog-agent
LAST DEPLOYED: Wed Mar 11 11:51:44 2020
NAMESPACE: default
STATUS: deployed
REVISION: 1
TEST SUITE: None
NOTES:
DataDog agents are spinning up on each node in your cluster. After a few
minutes, you should see your agents starting in your event stream:
    https://app.datadoghq.com/event/stream
Be sure to install the chart to a non-default namespace such as datadog or datadog-monitoring using the command helm install --namespace <your_ns>.
Verify installation
Verify that the Agent deployed successfully by running the following:
oc get pods | grep datadog

datadog-agent-cluster-agent-68b5ff9d5d-mddgt        1/1     Running   0          123m
datadog-agent-kube-state-metrics-588b774bdd-j5ftg   1/1     Running   0          123m
datadog-agent-l6dj2                                 1/1     Running   0          123m
datadog-agent-kfvpc                                 1/1     Running   0          123m
datadog-agent-xvss5                                 1/1     Running   0          123m
The output shows that the Cluster Agent pod and three node-based Agent pods are running. The number of node-based Agent pods should be the same as the number of nodes in your cluster. We can also see the kube-state-metrics pod.
In order to check that the node-based Agents are successfully communicating with the Cluster Agent, select the name of one of your node-based Agent pods and run:
oc exec datadog-agent-l6dj2 agent statusAt the bottom of the output, you should see something like:
=====================
Datadog Cluster Agent
=====================

  - Datadog Cluster Agent endpoint detected: https://172.30.200.227:5005
  Successfully connected to the Datadog Cluster Agent.
Data from your OpenShift cluster should now be streaming into your Datadog account.
Autodiscover your services
With the Datadog Agent successfully deployed, resource metrics and events from your cluster should be streaming into Datadog. In addition to metrics from your nodes’ kubelets, data from services like kube-state-metrics and the Kubernetes API server automatically appear thanks to the Datadog Agent’s Autodiscovery feature, which listens for container creation events, detects when certain services are running on those containers, and starts collecting data from supported services.
Since kube-state-metrics and the API server are among the integrations automatically enabled by Autodiscovery, there’s nothing more you need to do to start collecting your cluster state metrics in Datadog. In the case of OpenShift, this gives you out-of-the-box access to cluster state information, including metrics that OpenShift exposes through the Kubernetes API that track OpenShift-specific objects like cluster resource quotas. (You can read more about what metrics are available in our documentation.)
Auto-configured services include common infrastructure technologies like Apache (httpd), Redis, and Apache Tomcat. When the Datadog Agent detects those containers running anywhere in the cluster, it will attempt to apply a standard configuration template to the containerized application and begin collecting monitoring data.

For services in your cluster that require user-provided configuration details (such as authentication credentials for a database), you can use Kubernetes pod annotations to specify which Datadog check to apply to that pod, as well as any details necessary to configure the monitoring check. For example, to configure the Datadog Agent to collect metrics from your MySQL database using an authorized datadog user, you would add the following pod annotations to your MySQL pod manifest:
annotations:
  ad.datadoghq.com/mysql.check_names: '["mysql"]'
  ad.datadoghq.com/mysql.init_configs: '[{}]'
  ad.datadoghq.com/mysql.instances: '[{"server": "%%host%%", "user": "datadog","pass": "<UNIQUE_PASSWORD>"}]'
Those annotations instruct Datadog to apply the MySQL monitoring check to any mysql pods, and to connect to the MySQL instances using a dynamically provided host IP address and authentication credentials for the datadog user.
Get visibility into your control plane
Datadog integrates with Kubernetes components including the API server, controller manager, scheduler, and etcd. This means that, once enabled, in addition to key metrics from your nodes and pods you can also monitor the health and workload of your cluster’s control plane. Datadog provides out-of-the-box dashboards for several of these components, including the scheduler, shown below.

See our documentation on steps to enable these integrations and start collecting metrics from your cluster’s API server, controller manager, scheduler, and etcd.
Note that if you are running OpenShift in a managed cloud environment, the control plane is managed by the cloud provider, and you may not have access to metrics for all of these components.
Monitor a changing environment with tags
Datadog automatically imports metadata from OpenShift, Kubernetes, cloud services, and other technologies, and creates tags that you can use to sort, filter, and aggregate your data. Tags (and their Kubernetes equivalent, labels) are essential for monitoring dynamic infrastructure, where hostnames, IP addresses, and other identifiers are constantly in flux. With Datadog, you can filter and view your resources by tags, including ones that Datadog automatically imports from your environment such as Deployment, service, or container image. Datadog also automatically pulls in tags from your cloud provider, so you can view your nodes or containers by availability zone, instance type, and so on.
In the datadog section of your values chart, you can add custom tags with the DD_TAGS environment variable, followed by key:value pairs. For example, you could apply the following tags to your node-based Agents to indicate the organizational name of the Kubernetes cluster and the team responsible for it:
values.yaml
datadog:
 [...]
 - cluster-name:melange
 - team:core-platform
You can also use the podLabelsAsTags parameter to import Kubernetes pod labels as tags, which captures any pod-level metadata that you defined in your manifests as tags. This ensures that you can use that metadata to filter and aggregate your telemetry data in Datadog.
Go deeper with logs, traces, and more
We’ve seen how the Datadog Agent automatically collects metrics from your nodes and containers. To get even more insight into your cluster, you can also configure Datadog to collect logs and distributed traces from the applications in your cluster. Note that to do this, your pods must have access to the host port of the node they run on. We handled this earlier by setting the agents.useHostNetwork parameter to true in the Helm values chart for the Datadog Agent.
Collect and analyze cluster logs
Datadog can automatically collect logs from Kubernetes, Docker, and many other technologies you may be running on your cluster. Logs can be invaluable for troubleshooting problems, identifying errors, and giving you greater insight into the behavior of your infrastructure and applications.
In order to enable log collection from your containers, add the following variables to the Datadog Helm values chart you created earlier:
values.yaml
datadog:
  [...]
  logs:
    enabled: true
    containerCollectAll: true
You can update your Agent with these changes with the following command:
helm upgrade -f path/to/values.yaml <AGENT_SERVICE_NAME> stable/datadogWith log collection enabled, you should start seeing logs flowing into the Log Explorer in Datadog. These logs include those emitted by pods running OpenShift’s Operators. Use tags to filter your logs by project, node, Deployment, and more to drill down to the specific logs you need.
Bring order to your logs
Datadog automatically ingests, processes, and parses all of the logs from your cluster for analysis and visualization. To get the most value from your logs, ensure that they have a source tag and a service tag attached. For logs coming from one of Datadog’s log integrations, the source sets the context for the log (e.g. nginx), enabling you to pivot between infrastructure metrics and related logs from the same system. The source tag also tells Datadog which log processing pipeline to use to properly parse those logs in order to extract structured facets and attributes. Likewise, the service tag (which is a core tag in Datadog APM) enables you to pivot seamlessly from logs to application-level metrics and request traces from the same service for rapid troubleshooting.

The Datadog Agent will attempt to automatically generate these tags for your logs from the image name. For example, logs from Redis containers will be tagged source:redis and service:redis. You can also provide custom values by including them in Kubernetes annotations in your deployment manifests:
  annotations:
    ad.datadoghq.com/<CONTAINER_IDENTIFIER>.logs: '[{"source":"<SOURCE>","service":"<SERVICE>"}]'
Track application performance with Datadog APM
Datadog APM traces requests to your application as they propagate across infrastructure and services. You can then visualize the full lifespan of these requests from end to end. APM gives you deep visibility into application performance, database queries, dependencies between services, and other insights that enable you to optimize and troubleshoot application performance.
Datadog APM auto-instruments a number of languages and application frameworks; consult the documentation for supported languages and details on how to get started with instrumenting your language or framework.
Enable APM in your OpenShift cluster
To enable tracing in your cluster, add the following to the values chart for the Datadog Agent:
values.yaml
datadog:
  [...]
  apm:
    enabled: true
    port: 8126
By default, Datadog uses port 8126 for traces. You can customize this with the apm.port variable.
Update your Agent with these changes:
helm upgrade -f path/to/values.yaml <AGENT_SERVICE_NAME> stable/datadogNext, provide the host node’s IP as an environment variable to ensure that application containers send traces to the Datadog Agent instance running on the correct node. This can be accomplished by configuring the application’s Deployment manifest to provide the host node’s IP as an environment variable using Kubernetes’s Downward API. Set the DD_AGENT_HOST environment variable in the manifest for the application to be monitored:
spec:
      containers:
      - name: <CONTAINER_NAME>
        image: <CONTAINER_IMAGE>:<TAG>
        env:
          - name: DD_AGENT_HOST
            valueFrom:
              fieldRef:
                fieldPath: status.hostIP
When you deploy your instrumented application, it will automatically begin sending traces to Datadog. From the APM tab of your Datadog account, you can see a breakdown of key performance indicators for each of your instrumented services, with information about request throughput, latency, errors, and the performance of any service dependencies.

You can then dive in and inspect a flame graph that breaks down an individual trace into spans—each one representing an individual database query, function call, or operation carried out as part of fulfilling the request. For each span, you can view system metrics, application runtime metrics, error messages, and relevant logs that pertain to that unit of work.

The Datadog Operator
The Datadog Operator simplifies the task of configuring and managing the Agents monitoring your cluster. You can deploy the node-based Agent DaemonSet, the Cluster Agent, and cluster check runners using a single Custom Resource Definition (CRD).
The Datadog Operator is available on the community operator hub and has received Red Hat OpenShift Operator Certification, meaning that it has been tested to work with OpenShift clusters and screened for security risks.
View your entire cluster from a single platform
If you followed along with the steps in this post, you have:
- Deployed the Datadog Cluster Agent and node-based Agent to collect cluster-level metrics and events from your OpenShift environment
- Seen how Autodiscovery can monitor your dynamic workloads even as containers are deployed and destroyed
- Ingested logs from your containers and the workloads running on them
- Set up APM and instrumented your applications to collect distributed traces
Datadog has additional features that can give you even deeper insights into your OpenShift cluster. You can see the documentation for our OpenShift and Kubernetes integrations for information on how to set up process monitoring, network performance monitoring, custom metric collection, and more.
If you’re not already using Datadog, sign up for a free trial and get end-to-end visibility into your OpenShift clusters along with more than 750 other technologies.
Source Markdown for this post is available on GitHub. Questions, corrections, additions, etc.? Please let us know.
